


Home > Dodge


Why choose MoparPartsGiant

Swift Delivery Assurance
At MoparPartsGiant.com, we prioritize your Dodge's needs by providing only genuine Dodge parts sourced directly from authorized dealers. Our #1 online store ensures zero risk for customers, as all our auto parts come with a manufacturer's warranty. To further enhance your experience, we offer expedited shipping on eligible orders, guaranteeing rapid delivery without any hassles.

Exceptional Customer Support
Our dedicated customer service team at MoparPartsGiant.com is committed to assisting you throughout your shopping journey. Whether it's through email, live chat, or a phone call, our experienced representatives are available to address your inquiries. With a comprehensive Dodge parts catalog and extensive inventory, we ensure prompt delivery of your orders anywhere in the nation.

Unbeatable Prices
MoparPartsGiant.com is your go-to destination for genuine Dodge parts at incredibly low prices. Whether you require parts for standard maintenance or repair, we've got you covered. Our competitive pricing on Dodge parts ensures you won't need to look elsewhere. Choose us as your one-stop shop for high-quality Dodge parts without straining your wallet!
Popular Genuine Dodge Parts



Genuine Dodge Accessories
Popular Dodge Accessories

Decals
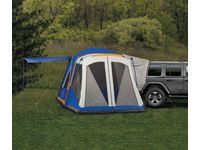
Tents

Floor Mats

Wheel Covers
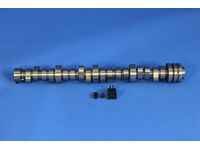
Engines
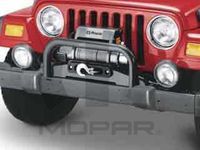
Winches
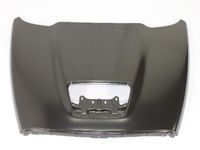
Hood

Mirrors

Speaker
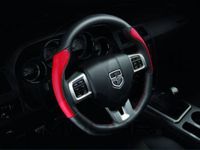
Steering Wheels
View All Genuine Mopar Accessories >
Shop Genuine Dodge Parts with MoparPartsGiant.com
Dodge is an exceptionally well known auto brand, starting over 100 years ago with the Dodge model 30-35. Over the next century Dodge has produced a wide range of vehicles, full-sized cars, and trucks, to compact models like the Dart. Dodge's legacy includes iconic vehicles such as the Viper, Duranger, Challenger and Charger. Dodge cars are renowned for their powerful engines and high-quality Dodge parts. Dodge has consistently put an emphasis on performance, durability, and innovation throughout its long history.
The Dodge Challenger has embodied the spirit of American muscle cars, by being known for its retro appeal, and highly potent performance, reminding drivers of the golden age of muscle car horsepower. The Dodge Charger has defined the fusion of a full-size sedan with a high performance ethos, which appeals to those looking for spaciousness coupled with raw power. The Dodge Durango has offered families a unique blend of SUV practicality, and exciting driving dynamics. The Dodge Viper is an iconic vehicle which has been etched in the hearts of Dodge enthusiasts for years, for its unparalleled power and distinctive design.
Dodge has long been known for its performance-oriented vehicles, and has continued to push the boundaries of automotives, with its Dodge Parts, engines, and transmissions. The Dodge Challenger SRT Hellcat Redeye is a miraculous vehicle wielding a supercharged 6.2L HEMI V8 engine that outputs an astonishing 797 horsepower at 707 lb-ft of torque. This monstrous engine is combined with a 8-speed TorqueFlite automatic transmission, specifically calibrated to handle this Hellcat's unstoppable power and give it precise, rapid shifting. The transmission also employs paddle shifters and a manual mode, providing drivers with enhanced choice and control. The Dodge Durango SRT is also an impressive beast with a 6.4L HEMI V8, at 475 horsepower. Dodge's focus on powerful performance, when combined with their sophisticated transmission technology, and genuine Dodge parts, has cemented Dodge's stalwart reputation by delivering truly exhilarating driving experiences for the modern automobile enthusiast.
OEM Dodge parts are the #1 choice in terms of quality. Crafted by Dodge, they follow rigorous factory specs and go through the demanding quality control processes during manufacturing. You're at the right spot, MoparPartsGiant.com, if you're in search of top-notch OEM Dodge parts, including Exhaust, Differential And Drive Line. Our extensive line of genuine Dodge parts, like Air Conditioners & Heater, Wiper & Washers And Cylinder & Keys is competitively priced. Apart from affordability, our parts come with added benefits such as a hassle-free return policy, expedited shipping, manufacturer's warranty, and assured durability and reliability. MoparPartsGiant.com today for all your Dodge needs!
Dodge Parts Questions & Answers

Q:
How to check and replace engine mounts in 3.6L V6 engine on Dodge Avenger?
A:
On these models, the engine mounting system incorporates four molded mounts, the right and left mounts bear the engine/transaxle, while the front and rear mounts counteract the torquing action of the powertrain. These components do not need much attention; however, if there is a broken or worn out engine mount, it is necessary to replace it as soon as possible to avoid damage to or additional wear of other components of the drive train. To check the mounts, the engine must be lifted off the mounts creating some space for checking the damage; this is done by placing jack stands under some portions of the vehicle, placing a jack on the engine oil pan and placing of a wooden block between the jack and the vehicle before bucking up the vehicle. Cracks, hardened rubber, and the signs of separation from the metal backing of the mounts must be also looked for and, finally, relative movement between mount plates and the engine or frame must be controlled. If this is so the engine should drop and the mount fasteners tightened. Rubber preservative may be used to reduce rate of decay. For replacement, the front mount has to be raised, the vehicle has to be properly supported to have the weight off the mounts and the pertinent bolts to put in a new mount need to be removed. When doing the left mount you remove the negative battery cable, air filter, as well as the housing and do the same thing as the right and replace it. The right mount need to have the lower splash shield, engine ground strap, several other bolts to be taken off before the new mount is to be placed. Rear mount replacement is nearly analogous to the front procedure which involves lifting the engine, removing the heat shield, the bracket mounting bolts and finally fitting the new back end stoutly.
Read More

Q:
What precautions should be taken when handling the oil pressure relief valve and oil pump during inspection and installation in 3.5L V6 engine on Dodge Challenger?
A:
Never disassemble the oil pressure relief valve spring and plunger from the oil pump; if the oil pressure relief valve is defective replace the complete oil pump assembly. First un-bolt and take-off the timing belt and the crankshaft sprocket, then the oil pan and the oil pump pick-up tube. Next, remove the bolts and its cover using a wrench, after that pull out the oil pump from the block. For inspection, unbolt the cover from the back of the oil pump housing and remove the inner and outer rotors and as a process make sure of the direction they are to be reinstalled. wash all parts in solvent and inspect the rotors, pump cover and housing for such damage as score, wear, pitting or denting; if any, replace the assembly. Check the oil pump cover for warpage with the help of straight edge and the feeler gauge; if found to be warped beyond the limit then replace the pump. The thickness and diameter of the outer rotor should be measured with a micrometer and, if the thickness is less than or the diameter is more than the specified limit, the pump should be replaced. Check the thickness of the inner rotor and if you find it is less than the prescribed limit replace the pump. Insert the outer rotor into the housing and then measure the clearance at the opposite side: if this clearance is higher than the maximum allowable, replace the pump. The inner rotor shall be put in place and the gap between the indentations of the outer and inner rotors taken; if this gap is larger than indicated the pump assembly shall be replaced and the inner rotor put in place with the mark uppermost. Gauge the side clearance with a straightedge against the faces of the pump housing and the rotors: if the measurement is more than the acceptable limit, change the pump. For installation, first, pour engine oil into the housing of the oil pump and install the pump cover and thereafter tighten the bolts up to the recommended torque value. The gasket must be placed on the mating surface of the engine block while the flats of the rotor must be engaged with the crankshaft before the oil pump housing is placed on the engine block. Last, add and torque the pump to block bolts and do the reverse to how they were removed to finally complete the installation.
Read More

Q:
How to remove the axle shaft assembly on Dodge Dakota?
A:
Support the back of your car by lifting it up, then use jackstands under each frame rail to hold it there. Remove both rear wheels afterward. Separate the driveshaft from the axle, then unhook the ABS sensor and disconnect the parking brake cable from its anchor on the parking brake lever. On the rear axle, free up the vent connection, take off the brake line attachment block from the axle tube, detach the brake lines from clips and brackets on the axle housing, and remove the back brakes calipers. Remember to support the caliper weights with string to avoid breaking the flexible brake line. Begin installation on the back axle by raising it using a floor jack, adding another jack if necessary due to the offset rear differential. Pop off the stabilizer bar bolts and get rid of the lower mounting bolts holding back the shocks. After putting jack(s) beneath the axle, loosen Dakota's U-bolts connecting axle to springs, slowly lower and take out the axle from under the truck. Start installation by doing the opposite of what you just removed. First, retighten the U-bolt nuts on Dakota models and the caliper mounting bolts on all models. Tighten the lug nuts, check and refill the axle with necessary lubricant. 4WD models need you to first raise the front of the car and support it with jack stands, then unscrew the front wheels, take out the driveaxles, and move on. Take out the bolts holding the cross member to its place, take out the cross member, disconnect the driveshaft where it meets the differential pinion flange, and safely move the driveshaft out of your way. Disconnect the vent tube from the differential cover, prop up the axle with a floor jack under the differential, then take out the bolts that attach the axle assembly to the left engine mount and the pinion nose bracket, before removing the axle's final mounting bolts on the right engine mount. Lower the jack very carefully and remove the axle component from underneath the car. Instructions for putting it back are the same steps in reverse order.
Read More

Q:
What Steps Should You Follow to Prepare and Reassemble the Cylinder Head After Valve Servicing on Dodge Grand Caravan?
A:
Regardless of whether the head was sent to an automotive repair shop for valve servicing, ensure it is clean before beginning reassembly. If the head was sent out for valve servicing, the valves and related components will already be in place, allowing you to start the reassembly procedure. Begin by installing the spring seats or valve rotators, if equipped, before the valve seals. New seals should be installed on each of the valve guides; gently tap each seal into place using a hammer and a deep socket or seal installation tool until it is completely seated on the guide, ensuring the valve stem seals are installed evenly and carefully to avoid damage. Avoid twisting or cocking the seals during installation to ensure proper sealing on the valve stems. Starting at one end of the head, lubricate and install the first valve, applying moly-base grease or clean engine oil to the valve stem. Position the valve springs and shims, if used, over the valves, compress the springs with a valve spring compressor, and carefully install the keepers in the groove, then slowly release the compressor to ensure the keepers seat properly. A small dab of grease can be applied to each keeper to hold it in place if necessary. Repeat this procedure for the remaining valves, ensuring that components are returned to their original locations without mixing them up. Check the installed valve spring height with a ruler graduated in 1/32-inch increments or a dial caliper; if the head was sent out for service work, the installed height should be correct, but do not automatically assume it is. The measurement is taken from the top of each spring seat to the bottom of the retainer, and if the height exceeds specified limits, shims can be added under the springs to correct it, but do not shim the springs to the point where the installed height is less than specified. Apply moly-base grease to the rocker arm faces and the shaft, then install the rocker arm assembly on the cylinder head, followed by the installation of the camshafts, hydraulic lash adjusters, and rocker arm assemblies onto the head.
Read More
Featured Dodge Models
What Our Customers Are Saying

top servies
thank you veay mach nice price
Posted by Reviewer on June 30, 2026

Verified Purchase
ECM Bit the Dust
So much for Jeeps taking on water. Got caught in a rain storm **** and doorless. Gladiator went into E-mode. I could start it, just couldn't shut it off. After 1 month, the ECM gave up the farm. Now have 6000lb paperweight. Half the price of the dealer. What a lifesaver! Fast n easy checkout.
Posted by Reviewer on June 29, 2026

Verified Purchase
Quick message ,intant reply
Posted by Reviewer on June 17, 2026

Verified Purchase
Right parts and right price
I'm glad I found this site. Dealer parts without the dealer pricing. Fast shipping. Can't ask for much more than that.
Posted by Reviewer on June 15, 2026

Verified Purchase
discontiued parts
dealer said no, mopar giant said yes
Posted by JustMe on June 10, 2026
Verified Purchase
Shop with Confidence
4.18/5 of 2602 reviews


TrustScore 3.8 | 743 reviews
Information
Customer Services


Recommended sites for genuine OEM parts with great savings:
- AcuraPartsWarehouse.com
Genuine Acura Parts
- ToyotaPartsDeal.com
Genuine Toyota Parts
- LexusPartsNow.com
Genuine Lexus Parts
- NissanPartsDeal.com
Genuine Nissan Parts
- InfinitiPartsDeal.com
Genuine Infiniti Parts
- GMPartsGiant.com
Genuine GM Parts
- FordPartsGiant.com
Genuine Ford Parts
- HyundaiPartsDeal.com
Genuine Hyundai Parts
- KiaPartsNow.com
Genuine Kia Parts
- SubaruPartsDeal.com
Genuine Subaru Parts
© 2006-2026, MoparPartsGiant.com by Genuine Parts Unlimited, Inc.